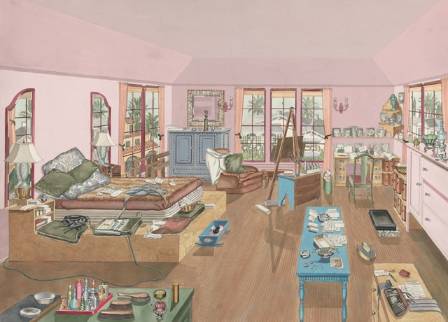
Kitchen note
How To Draw A Kitchen
Drawing a kitchen may feel like a big challenge, but it’s entirely doable! This guide breaks the process into manageable steps, from the overall structure to the little details that make a kitchen feel lived-in. Whether you’re just starting out or aiming to improve your skills, this step-by-step approach will help you create a convincing kitchen scene.
Skyler Dean
Cook
Bench note
The full story and useful tips are below.
Shelf
Plant kitchen
Drawing a kitchen may feel like a big challenge, but it’s entirely doable! This guide breaks the process into manageable steps, from the overall structure to the little details that make a kitchen feel lived-in. Whether you’re just starting out or aiming to improve your skills, this step-by-step approach will help you create a convincing kitchen scene.
How to Draw a Kitchen
Step 1: Establish the Room’s Shape
Every drawing begins with a foundational shape. For a kitchen, this is usually a rectangle or square representing the room itself. Decide on the vibe: cozy and compact or spacious and open? This will guide the proportions of your main shape.
Step 2: Choose Your Perspective
One-Point Perspective: Imagine looking straight at a wall. All receding lines converge at a single vanishing point on the horizon. Ideal for long, straight kitchen views.
Two-Point Perspective: Viewing from a corner gives two vanishing points, making the scene more dynamic and realistic. For this guide, we’ll use two-point perspective for an engaging layout.
Step 3: Draw Walls, Floor, and Ceiling
Walls: Pick the closest corner of the room. Draw lines receding to the left and right vanishing points from the top and bottom of this corner. Decide the wall height and connect the receding lines to complete the walls. Add the back wall by connecting side wall receding lines.
Floor: Draw lines from the bottom corner towards vanishing points, parallel to the walls.
Ceiling: Similarly, draw receding lines from the top corner to define the ceiling.
Tip: Keep all construction lines light—they’ll be refined later.
Planning the Kitchen Layout
A well-planned layout balances practicality and aesthetics. Think about the “work triangle” (sink, stove, refrigerator) and arrange your elements accordingly.
Core Elements:
Cabinets lining the walls
Appliances: fridge, oven, microwave, dishwasher
Work surfaces: countertops
Sink: often a focal point
Dining area: table and chairs
Optional: kitchen island
Common Layouts:
L-Shaped: Cabinets along two walls
U-Shaped: Cabinets along three walls
Galley Kitchen: Cabinets on two parallel walls
Island Kitchen: Central island with surrounding cabinets
For this example, we’ll draw a kitchen with a central island and wall cabinets.

Drawing Cabinets
Basic Shapes:
Cabinets are essentially rectangular boxes in perspective.
Wall Cabinets: Mounted above the counter. Draw boxes that follow wall perspective.
Base Cabinets: Rest on the floor, supporting the counter.
Adding Details:
Divide fronts into panels for doors and drawers
Add knobs or handles
Ensure wall cabinets align with perspective, keeping the bottom edge consistent above the counter
Adding Appliances
Key Appliances:
Refrigerator: Tall rectangle, placed so it doesn’t obstruct pathways
Oven/Stove: Freestanding or built-in within cabinets
Microwave: Above stove, on the counter, or integrated into a cabinet
Dishwasher: Usually near the sink
Tips for Perspective:
Ensure all appliance edges follow the room’s perspective
Include details like handles, stovetops, control panels, and vents
Countertops and Sink
Countertop:
Draw the counter on top of base cabinets, following the room’s perspective lines.
Sink:
Place the sink in the counter, often central or under a window
Draw the basin shape (rectangular, square, or round)
Add faucet, backsplash, or other features above the counter
Kitchen Island
Form:
Draw a box for the island, aligned with perspective lines
Add a countertop surface on top
Optional Features:
Seating: Overhang for stools or chairs
Storage: Cabinets or drawers in the island
Appliances: Some islands include a cooktop or secondary sink
Table and Chairs
Table:
Can be round, square, or rectangular
Draw the top surface in perspective
Add legs or a pedestal base, angled correctly according to the perspective
Chairs:
Place around the table
Include seat, back, and legs
Ensure perspective is consistent; foreshortening applies for angled views
Add subtle details like cushions or back patterns
Adding Utensils and Finishing Touches
Include kitchen items like pots, pans, toaster, mixer, or jars on counters
Draw a window with frame and glass in perspective
Ceiling lights or pendant lighting can enhance realism
Add floor patterns, like tiles or wood grain
Refining the Drawing:
Vary line weight: thicker lines for objects closer, thinner for distant objects
Add shading to create depth and volume based on your light source
Optional color: warm tones create a cozy feel, cool tones look modern
Step-by-Step Summary
Draw the room’s basic shape (rectangle)
Choose perspective: one-point or two-point
Sketch walls, floor, and ceiling using receding lines
Plan layout: cabinets, appliances, island, table, chairs
Draw cabinets: base and wall, with doors and drawers
Add appliances in proper perspective
Sketch counter and sink
Draw kitchen island with features
Place table and chairs
Add utensils, lighting, windows, and other details
Refine lines, add shading, and erase construction marks

More from the kitchen

· en
Why a Sunset at Sea Feels Different
Elowen Hart

· en
Bay Windows: The Right Mix of Elegance and Comfort
Alistair Wren

· en
Interessante Wahrheiten und Traditionen der Pasta
Elise Hartwig

· en
Jiuzhaigou: A Natural Wonderland of Lakes, Waterfalls and Forests
Charles Whitmore

· en
Exploring Innovative Roof Designs: A Comprehensive Guide
Michael Hughes

· en
Luxury Automatic Coffee Machines
Sara Monroe